Battletech AAR: Assassination on Jacomarie
House Liao was at it again. They needed a spy assassinated because...House Liao. I didn't care. Money was money, and my lance of 'mechs, dubbed "Sunbleached Retribution" (I started this campaign during the summer!), was always looking for a fight for pay. So, after negotiating a decent contract, I sent four of my best pilots down to the planet of Jacomarie in search of a fight.
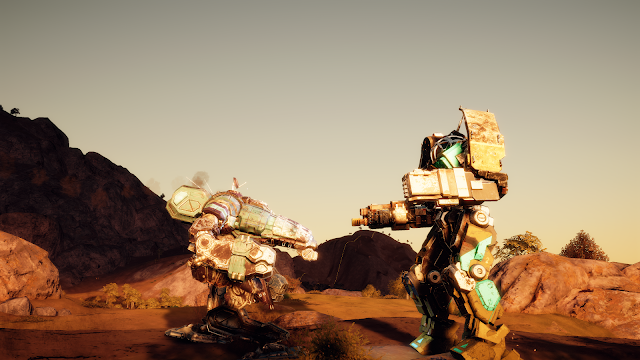
Our target for the assassination was located in a lowland region of the planet. It proved to be a very picturesque spot as the early morning sun cast its rays upon this lightly forested hill country.
 |
| My 'mechs soak in some early morning sun |
It turned out that our drop location was spot-on because the enemy lance that contained our target was within easy sensor distance. It was clear they were eager for a fight, too, as an OpFor Crab CRB-20 BattleMech quickly rushed out position, guns blazing.
 |
| The Crab can be seen on the hill's prow to the top left |
Missiles were soon flying. My merc lance had recently salvaged a medium Trebuchet TBT-5N, and now seemed a good chance to see what it could do. When I refitted this mech, I equipped it with some modified Talos LRMs that had warheads primed to deliver extra heat damage. Time to put them to work! My Trebuchet let fly a salvo at an Enforcer BattleMech that was taking cover in some trees. Missiles away!
Score!
Lots of armor getting stripped there. But the same went for my own mercs as we caught our own share of LBMs and auto-cannon rounds. And just to keep things interesting, that enemy Crab decided to rush my lance commander's Griffin. Those...
...could do a lot of damage to my machine.
 |
| The Crab and my Lance Commander's Griffin face-off |
The enemy mech commander took his best shot. While he did strip some armor from "Promendade's" Griffen, his blow was more of an annoyance than an actual threat.
The opening skirmishes were now over; time for the main event.
I maneuvered my 'mechs to start taking advantage of any available cover as the incoming fire was proving hot and heavy. The first target on my list to take out was that annoying Crab. My lance commander maneuvered his Griffin away from the brawler - that Crab would like nothing better than to make this a boxing match what with his...
... - so I pulled him back and prepared to make good use of this 'mech's hefty armament. The last time this BattleMech was in the shop for some post-battle repairs, I had invested the money to equip it with a Diverse Optics enhanced medium laser (which I had salvaged from a recent battle). This bad boy inflicts significantly more damage than a standard medium laser. In addition to that, the Griffin also was sporting an SRM 6 launcher and a large laser. Time to fire them all with an alpha strike!
Boom! Took one of its...
...right off! Yeah! That's what 55-tons of badass metal can do to some crabmeat!
The odds were starting to swing in our favor,
But things would get even better when my 70-ton Orion ON1-K, the only heavy 'mech currently in my lance - got in on the act. My Orion sports some interesting weaponry of its own. To begin with, it mounts a Mydron AC/10 that is modified to deliver additional heat damage, as well as an Exostar damage/heat enhanced medium laser, along with a standard medium laser, and an SRM 2. Let's finish what the lance commander started.
The Crab was swamped by laser, auto-cannon and missile fire, losing one of its legs as a result! Down it fell like a...um...fish out of water!
 |
| My Orion (left) and the lance commander's Griffin (back) stand over the downed Crab |
Below the hill, my Shadow Hawk pilot, Eileen"Yeti" Katz, a wealthy Marik noble who took up 'mech combat for the thrills, had sensor-locked a distant 'mech with her sensor gear on her SHD-2D. This BattleMech was the heavy I previously detected, but with a sensor-lock, I could now positively identify it as a 75-ton Black Knight BL-6-KNT! It was bristling with weapons, something painfully proved when it unleashed on my Orion, stripping lots of armor from its frame and penetrating to the structure below. To see one of my most fearsome 'mechs get pounded so thoroughly put more than a little fear into me.
If we were going to survive this fight, we were going to need to fight a battle of maneuver, making use of as much natural cover as possible. With that in mind, I had my 'mechs fan out and form a rough semi-circle around the enemy 'mechs that were largely concentrated at the center of the hill.
 |
| My 'mechs form a rough arc around the enemy mechs on the central hill |
 |
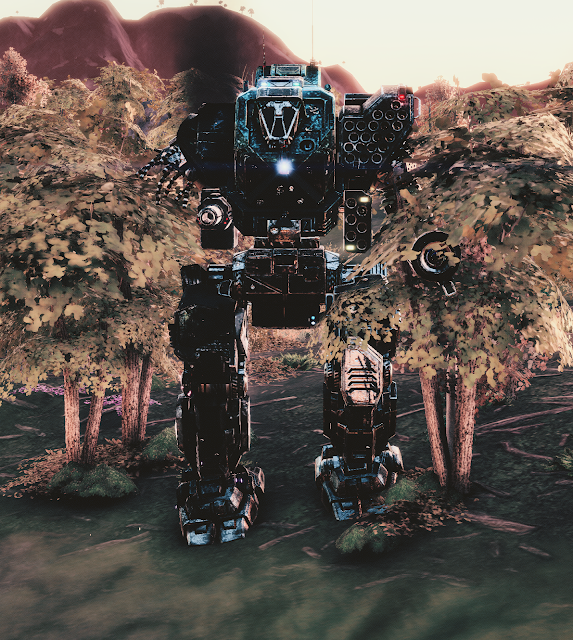
| "Danger's" mauled Orion takes cover in a stand of trees |
If there was a bright side, it was that the enemy Black Knight's fusion reactor overheated spectacularly from its alpha strike, forcing it to shutdown. It now was vulnerable to attack while the pilot struggled to cool and reboot the machine.
 |
| The Black Knight overheats and shuts down. |
Meanwhile, below the hill, "Yeti" and her Shadow Hawk identified and engaged an enemy Jagermech JM6-A. With some deft piloting that brought the Shadow Hawk behind the Jagermech - it was distracted trying to kill my Orion with long-range missile fire - "Yeti" launched a devastating series of attacks that blew off the Jagermech's left arm. What a shot in the arm for our morale! <ahem>
 |
| The Jagermech loses an arm to Yeti's Shadow Hawk (behind) |
Both sides were now suffering from significant damage. That being said, I was feeling a bit confident. Well, I was feeling confident until a fifth mech appeared in the distance...
Our spy finally revealed himself, sporting a Cyclops CP-10-Z that, unlike most of the other mechs we were fighting, was maintained in top form with full armor. Ouch! We didn't need a new challenge! My lance had better finish off some of these old foes quickly before the new warrior on the field tipped the scales against us! Get to work, MechWarriors!
"Danger" stepped up to the plate by unleashing a devastating salvo that destroyed the Black Knight's left leg, left arm and left torso! Down went all 75-tons of metal mayhem! My Trebuchet, piloted by Nik "Sandbag" Kinoshita, a periphery commoner who took up the merc life as a way out of poverty, finished the job by nailing the prone Black Knight's center torso, thereby killing it for good! Huzzah! The first true kill of the battle!
 |
| The moment the Black Knight lost its arm and leg to a salvo from my Orion. Just a flesh wound? |
 |
| My Lance Commander's Griffin admires his handiwork |
 |
| The OpFor's Enforcer gloats over his knockdown of my Lance Commander |
Rounding out the middlegame, "Danger" and her Orion scored yet another blow when she managed to remove the last claw from the Crab.
 |
| The OpFor now had two mechs with no arms: the Crab and the Jagermech that is just behind it! |
That's the end of those...
Lastly, my Trebuchet, being out of the main fight that was taking place on top of the hill, closed with our actual mission target and started pounding away at that fearsome Cyclops.
 |
| That stand of trees won't protect the spy (above) from my Trebuchet's wrath (below) |
Both lances had suffered considerable damage at this point. However, seeing how I had largely defanged two enemy BattleMechs, reducing them to mostly melee units, and successfully killed the Black Knight heavy, I think the battle was turning in our favor despite significant - and costly - damage to my lance. Now it was time to focus on killing our target.
Promenade's luck was starting to wear thin - the newly arrived Cyclops pounded him, inflicting yet another injury to my Lance Commander - so I thought it might be time for some radical maneuvering. Promenade fired his jump jets and retreated to a distant line of trees, and unleashed on the (somehow) still-standing Crab. This time the Crab found itself in hot water from which it would not emerge.
 |
| The Crab burns in a gulley just below the wreck of the Black Knight |
Meanwhile, "Yeti's" Shadow Hawk blasted the still dangerous Enforcer, destroying its deadly AC/10's ammo - sadly, no explosion. But we didn't need it as the shot penetrated to wreck the Enforcer's right arm and torso.
The rest of my 'mech's began to chip away at our actual mission target - boy, that thing has a lot of armor that needed to be whittled away! Seeing the savaged condition of both my Orion and Griffin, I suspected the fight was going to be won by my mostly intact Trebuchet and Shadow Hawk.
The battle raged on, but the endgame had arrived. Our fleeing spy, seeing the destruction of yet another friendly BattleMech, decided that military victory was no longer possible and started to hotfoot it to what I can only assume was a pre-arranged egress site. My 'mechs needed to stop that from happening.
First, time to rid ourselves of that annoying Enforcer. Even though my lance commander's Griffin was closer, his 'mech was both overheating and shot-up, so I decided to have him jump jet out of the action. Instead, "Sandbag" and his trusty Trebuchet would engage. Unleashing a deadly volley of missiles, he finished off the Enforcer!
 |
| "Sandbag" overheats his 'mech to kill the Enforcer |
His alpha strike overheated his 'mech's fusion reactor, but the risk proved worth it for the kill!
We were down to our actual target! Our spy's 'mech took a shot at "Sandbag" before making a run for the gulley below the hill. It turned out that he wouldn't get far. Before he made his way down the hill, "Yeti" and her Shadow Hawk struck a solid blow that removed the Cyclop's left arm and its attached laser! Good start!
The spy didn't bother to return fire, he just ran.
 |
| The spy and his damaged Cyclops make a run for it |
Three of my four 'mechs were out of range for direct attacks, so they all unleashed peppering LRM missile fire to harass the retreating mech. It was "Sandbag" who would, yet again, get the kill. Maneuvering behind the retreating Cyclops, he unleashed another alpha strike that scored a lucky hit on the thinner rear armor of the enemy 'mech. The strike hit home, detonating the SRM ammo bin mounted on the Cyclops! The resultant explosion killed the spy inside! Huzzah! Mission accomplished!
Victory! And we didn't lose a single mech!
Not surprisingly, Our employer was pleased with the results, giving us a 25% boost in contract payout for a total of 572,250 C-Bills, as well as just under 5 million C-Bills in claimed salvage! Nice!
Unfortunately, the damage to my lance was severe. My engineer informed me that my Orion would be combat ineffective for 14 days, and require 247,850 C-Bills worth of repairs. My Lance Commander's Griffin needed 232,150 C-Bills worth of repairs over 8 days. Lastly, "Sandbag's" heroic Trebuchet only suffered light damage worth a measly 10,500 C-Bills, a single day's worth of repair work. The grand total of repairs equated to 490,500 C-Bills, something that almost erased my contract's cash payout!
My MechCommanders needed some work, too. Heroine "Danger" got beat up pretty badly in her Orion and would be in medbay for 42 days, with my Lance Commander only needing 17 days thanks to his cockpit mod reducing the severity of the injuries.
It was a costly op, but we completed the job and had, well, not a lot of C-Bills to show for it, but a little walking-around money. And in the world of mercenary BattleTech work, that was definitely a win!


Comments
Post a Comment